Why Most Traders Lose Money Using Fibonacci Retracements — And How Institutional Gravity Zones Fix It
 Quantum Algo7 min read·Just now
--
A data-driven breakdown of why standalone Fibonacci levels fail, and how combining them with institutional order flow creates a measurable edge in crypto derivatives trading.
Fibonacci retracements are one of the most popular tools in technical analysis. Open any trading forum, YouTube channel, or course, and you’ll find someone drawing 0.618 levels on a chart and calling it a strategy.
The problem? Used alone, Fibonacci levels are barely better than random.
I’ve spent the last 18 months building and backtesting automated trading systems for crypto perpetual futures. After running over 500 backtests across 10+ pairs on multiple timeframes, I can tell you exactly why most Fibonacci strategies fail — and what actually works when you combine them with the right confluence filters.
The Problem With Naked Fibonacci Levels
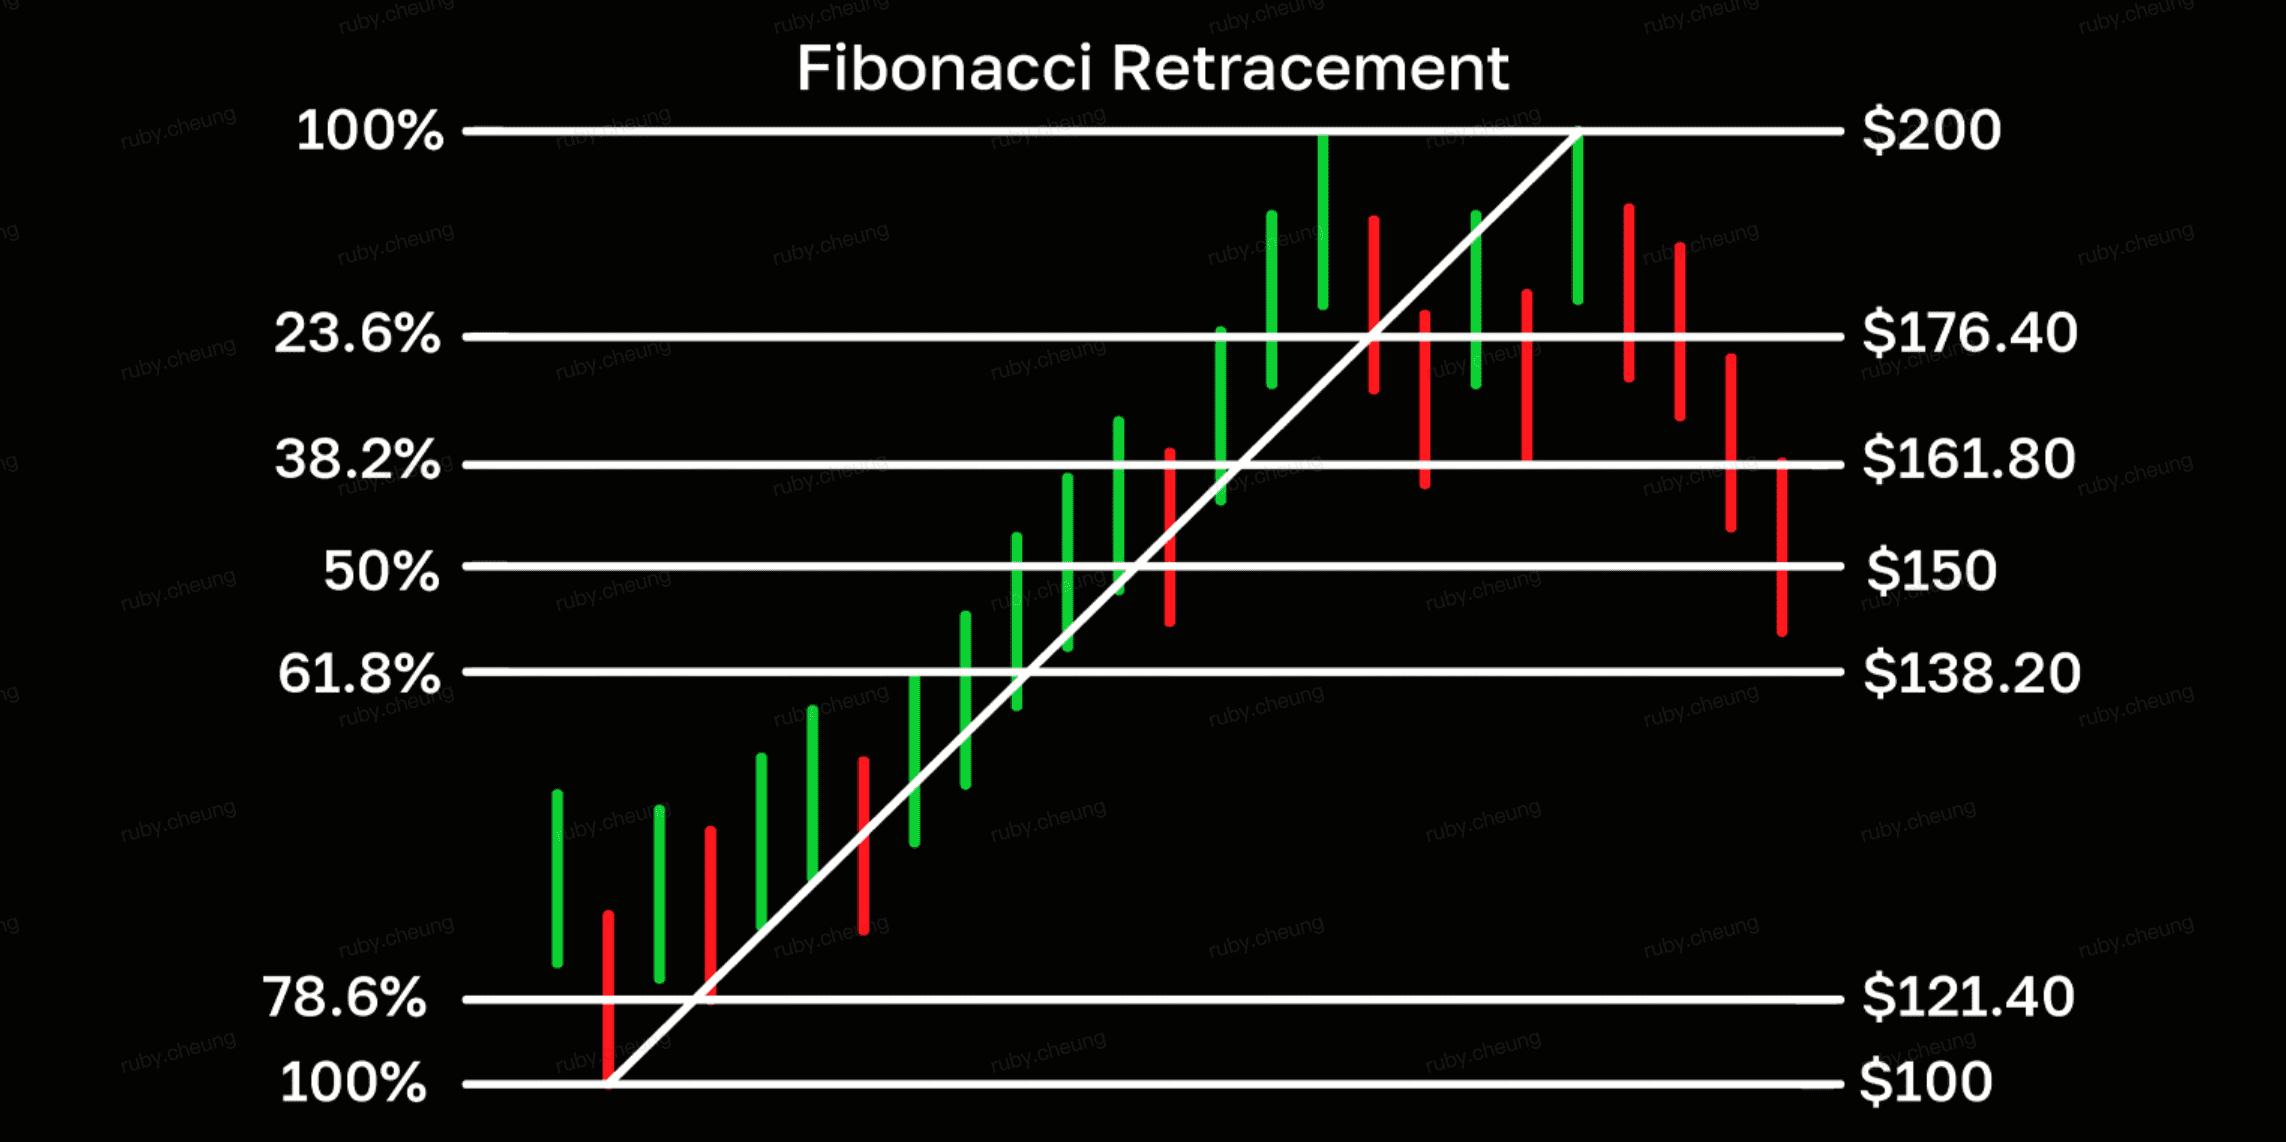
The standard approach goes like this: identify a swing high and swing low, draw Fibonacci retracement levels, and enter a trade when price touches the 0.618 “golden pocket.” Set a stop below the swing low. Wait for profit.
This sounds clean in theory. In practice, here’s what happens:
Price doesn’t care about your levels. The 0.618 retracement is a mathematical ratio, not a supply/demand zone. Price blows through it just as often as it respects it. Without additional confluence, you’re essentially flipping a coin with a slightly better risk-to-reward ratio.
No volume context. A retracement to 0.618 during low-volume Asian session consolidation means something completely different than a retracement during a high-volume US/EU session reversal. Naked Fibonacci ignores this entirely.
No trend filter. Drawing Fibonacci levels in a choppy, range-bound market produces signals that look identical to signals in a strong trend — but the outcomes are dramatically different.
No institutional context. Retail traders draw Fibonacci on any random swing. Institutions operate around specific price levels — the 200-period moving average, VWAP, prior day highs and lows. When Fibonacci levels align with these institutional zones, the probability of a reaction increases significantly.
What Actually Works: Confluence-Driven Fibonacci Entries
After hundreds of backtests, I found that Fibonacci retracements become genuinely powerful when three conditions are met simultaneously:
1. Price Must Be Reacting to an Institutional Level
The 200-period moving average is one of the most widely watched levels in any market. When price approaches the 200 MA, institutional algorithms trigger orders. Market makers adjust their quotes. Fund managers make allocation decisions.
I call the zone around the 200 MA the “Institutional Gravity Zone” — a dynamic area defined by the MA itself plus or minus one ATR (Average True Range). When price enters this zone and shows a reaction (a strong bullish or bearish candle), it signals that institutional participants are active.
This is the first filter. No entry happens unless price is reacting within this gravity zone.
2. Volume Must Confirm the Move
A price reaction without volume is meaningless. It could be retail noise, a stop hunt, or simple consolidation.
I require a volume spike — specifically, the current bar’s volume must exceed 1.5x the 20-period volume average. This confirms that real capital is behind the move, not just thin-market noise.
3. Fibonacci Retracement Must Align With Structure
Only after conditions 1 and 2 are met does Fibonacci enter the picture. The system identifies the recent swing high and swing low, calculates the 0.618 retracement level, and sets a pending entry at that price.
But here’s the critical difference: the stop loss isn’t a fixed distance from entry. It’s placed below the actual swing structure, plus a small ATR buffer. This means the stop is based on where the market structure actually invalidates — not an arbitrary number.
If price retraces to 0.618 within 8 bars, the entry fills. If it doesn’t, the setup expires and no trade is taken. This natural expiry filter eliminates roughly 30–40% of weak setups.
Backtesting Results: The Numbers
I backtested this approach on 10 major crypto perpetual futures pairs on the 2-hour timeframe over 12+ months of data, including both trending and range-bound market conditions.
The strategy used a specific risk management framework: when the first take-profit target is hit, 50% of the position closes and the stop loss moves to breakeven. The remaining 50% rides toward the second target or gets stopped at breakeven.
Here are the results for the top-performing pairs:
Bitcoin (BTCUSDT): 15 trades, 80% win rate, profit factor of 10.6, maximum drawdown of 11.9%. The equity curve showed consistent staircase growth with minimal dips.
Ethereum (ETHUSDT): 24 trades, 75% win rate, profit factor of 4.5, maximum drawdown of 11.9%. Slightly more trades than BTC due to more frequent 200 MA interactions.
Litecoin (LTCUSDT): 19 trades, 63% win rate, profit factor of 5.1, maximum drawdown of 8.7%. The lowest drawdown of all pairs tested, suggesting LTC’s price structure aligns particularly well with this approach.
The key observation: pairs with strong institutional participation performed dramatically better. BTC, ETH, and LTC are among the most traded crypto assets with deep order books. Their price behavior around the 200 MA is more predictable because larger players are operating at those levels.
In contrast, pairs like Solana showed negative returns (-21%) with the same strategy. The 200 MA doesn’t carry the same significance for assets with thinner order books and more retail-driven price action.
Why the 50% Close + Breakeven Strategy Matters
One of the most impactful findings from our backtesting was the effect of the exit strategy on overall performance.
The traditional approach — enter at Fibonacci level, set a fixed stop, set a fixed target, wait — leaves too much on the table or gives back too much profit on reversals.
The 50% close + breakeven approach works differently:
- TP1 hit: 50% of the position closes at the first profit target (2x ATR from entry). This locks in guaranteed profit.
- Stop moves to breakeven: The remaining 50% now has zero downside risk. You can’t lose on this portion of the trade.
- Ride to TP2 or breakeven: The remaining position either reaches the second target (4x ATR) for a full win, or gets stopped at breakeven for a half-win.
The worst-case scenario when TP1 is hit is that you keep 50% of the TP1 profit and lose nothing on the rest. This dramatically smooths the equity curve and reduces maximum drawdown compared to an all-or-nothing approach.
Building Your Own Watchlist: The 6-Criteria Filter
Not every trading pair is suitable for this strategy. Based on extensive backtesting, I developed a strict 6-criteria filter for qualifying pairs:
- Profit Factor ≥ 2.0 — the strategy must generate at least $2 for every $1 lost
- Win Rate ≥ 50% — you need to win at least half your trades to avoid psychologically damaging losing streaks
- Maximum Drawdown ≤ 15% — backtested drawdown must stay below 15% to provide a safety buffer for live trading
- Minimum 12 Trades — statistical significance requires an adequate sample size
- Net Profit ≥ 20% — the pair must earn its position in a limited watchlist
- Clean Equity Curve — no 30%+ collapses followed by recovery; the curve must trend consistently upward
A pair must pass ALL six criteria to qualify for the core watchlist. Pairs that pass 4–5 go on a “watch” list for future re-evaluation. Pairs that pass 3 or fewer are eliminated.
This approach prevents survivorship bias and ensures you’re only trading pairs where the strategy has demonstrated a genuine, consistent edge.
The Role of Automation
One of the biggest challenges with any Fibonacci-based strategy is execution. The retracement entry requires monitoring the chart and placing orders at precise levels — something that’s difficult to do manually across multiple pairs on lower timeframes.
I built an automated webhook system that connects directly from TradingView alerts to the exchange. When the confluence conditions fire and price retraces to the Fibonacci level, the system:
- Validates the signal against risk parameters
- Checks portfolio heat (total exposure across all positions)
- Calculates position size based on the distance to the swing-based stop loss
- Places the entry order with stop loss and take profit on the exchange
- Manages the 50% close and breakeven move automatically when TP1 is hit
This removes execution delay, emotional interference, and the physical limitation of not being at your screen 24/7 in a market that never closes.
Key Takeaways
Fibonacci levels alone are not a strategy. They’re a tool. Without confluence from institutional levels, volume confirmation, and trend alignment, they produce mediocre results.
The combination of institutional gravity zones + volume spike + Fibonacci retracement creates a measurable edge. Our backtests show profit factors above 4.0 on the best pairs with drawdowns under 12%.
Not all pairs are equal. High-liquidity assets with deep institutional participation (BTC, ETH, LTC) dramatically outperform thinner, retail-driven markets. Build a strict watchlist and only trade pairs that meet all your criteria.
Exit strategy matters as much as entry. The 50% close + breakeven approach smooths your equity curve and protects profits in a way that fixed-target exits cannot.
Automate what you can. Manual execution on 2-hour timeframes across multiple pairs is unsustainable. A webhook-based automation system ensures every valid signal gets executed with discipline.
This article is based on research conducted at Quantum Algo, where we develop institutional-grade trading indicators and automated execution systems for crypto derivatives. Our tools are available on TradingView and our indicator suite is accessible at quantum-algo.com. For a free education on the concepts discussed in this article, check out our 80-lesson trading academy.
Disclaimer: Trading crypto derivatives carries significant risk. Past performance does not guarantee future results. The backtest results presented in this article are historical and may not reflect future performance. Always trade with capital you can afford to lose.