How I built a sub-skill that handles third-party library integration, the problems I ran into, and what I learned
Hi there 👋
This is Part 2 of “Let Your Agent Set Up Angular Automatically” — and things are about to get a lot more interesting.
If you haven’t read Part 1 yet, I highly recommend giving it a quick read or skim before diving in. There’s also a video at the end of it that shows exactly how Part 1 works behind the scenes 👇
I Made My AI Agent Set Up Angular Projects Automatically — Here’s How
🎯 The challenge this time
In Part 1, I built a meta-skill that sets up a production-ready Angular project foundation from scratch — linters, formatters, git hooks, folder structure, and more — all automated.
But that’s just the foundation. Once your project is set up, the next thing every developer faces is the same: integrating third-party libraries. TailwindCSS, Angular Material, Firebase, Genkit, Auth… the list goes on. And just like the setup step, it’s something you do on every single project.
So the challenge was clear:
Can I automate this too?
The answer is yes — but with a catch.
Unlike the linters sub-skill (Actually, “foundation sub-skill” might be a better name 😆), which is fully deterministic and lets you sit back and watch the magic happen ☕, this new sub-skill is a different beast. Some libraries require your input. Some have tricky dependencies. Some need manual actions that no agent can do for you.
So no, you can’t just make a coffee and come back to a perfect project 😄 — but you can get pretty close. And the time you save is still massive.
This article walks you through this sub-skill — how I built it, how it works under the hood, the real problems I ran into while building it, an exciting part of the journey where I stress-tested the whole system, and key takeaways to wrap it all up.
Let’s go 🚀
🛠️ How I built it
Just like in Part 1, I used Claude’s built-in Skill Creator to generate the initial version of this sub-skill. Same approach — document your workflow first, feed it to the creator, test, refine, repeat.
But this time I had something extra to draw from. A few weeks earlier, I had built a standalone skill that generates llms.txt files directly from official documentation URLs — turning any library’s docs into up-to-date knowledge, a clean, structured reference file that an agent can actually use reliably. That skill became the foundation of how this sub-skill handles documentation fetching and knowledge management.
If you’re not familiar with that approach yet, I wrote a full article about it 👇
How to Make Any LLM Use Up-to-Date Instructions
It’s worth a read — because understanding how llms.txt files work makes everything in this sub-skill click much faster. The short version: instead of letting the agent guess from memory, you give it a structured, up-to-date reference file generated from the official docs. No hallucinations. No outdated configs. Just accurate setup instructions every time.
That idea is at the heart of this sub-skill.
🔧 How the sub-skill works under the hood
This sub-skill is not just a fancy npm install wrapper. It's a full orchestrator — it connects documentation, project context, and a strict execution loop so the agent can integrate libraries safely and verifiably, instead of guessing commands from memory or knowledge.
📖 The core philosophy is simple: fetch first, then act.
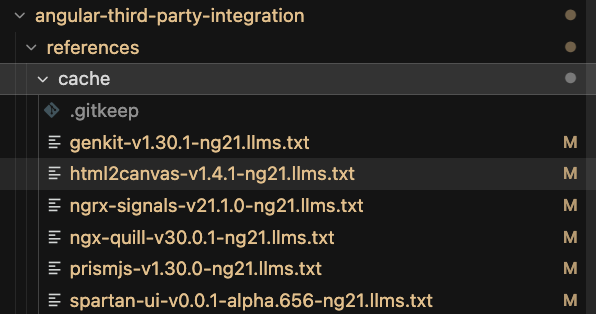
You provide official documentation URLs. The agent fetches the real pages — not search snippets, not its own knowledge — validates the content, and turns it into a standardized reference file. Think of it as a structured summary with fixed sections: overview, installation steps, APIs, known errors, best practices, and required manual actions like API keys or external dashboard setup. These files are the only approved source of truth during integration. Nothing else. And to avoid re-fetching the same docs every time, a version-aware cache stores them for future runs — keyed by library version and Angular major version.
🛡️ Before anything gets installed — the guards
Before touching a single dependency, the skill runs a series of checks:
- Is the git working tree clean? (no clean tree = no safe rollback)
- Is the app already running correctly? (We don’t integrate on top of a broken foundation)
- Is the PROJECT_MANIFEST.json* readable? (package manager, Angular version, previous choices — all required)
*It’s a small JSON file I added recently in the meta skill process in the project root that records the choices from project setup phase (name, Angular major, package manager, style, SSR, routing, zoneless, RxJS linting, bundle budget profile, etc.) and is updated by later steps (e.g., linters configured, integrations listed).
Looks like below:

Then comes the compatibility guard — a pre-install check against a compatibility matrix that knows about prerequisites (e.g., Tailwind must land before a UI kit that depends on it), minimum Angular version requirements, and libraries that need manual actions. Based on all of this, the skill determines the correct installation order and presents it to you for confirmation before starting.
🔄 The integration loop — one library at a time
No bulk installs. Ever.
Each library goes through its own isolated loop:
- Install and configure — strictly following the cached documentation
- Build verification — a full production build with a bounded number of retries (no infinite loops)
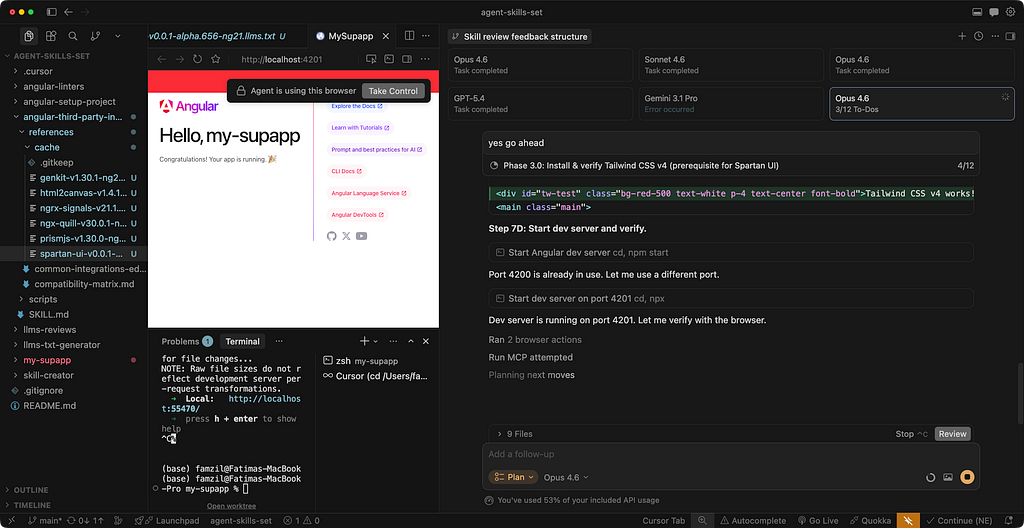
- Proof of life — optionally, a temporary “playground” change in the app + browser check to confirm the library actually works (see screenshot below)
- Format, lint, and commit — that library, in isolation, with its own clean commit
- Rollback if needed — if verification fails, only the files touched in that step are rolled back. Not the whole repo.
After each successful commit, a manual actions step surfaces everything that automation cannot handle — secrets, environment variables, external accounts — and appends them to a POST_INSTALL_ACTIONS.md file at the project root.
🧠 Team memory and edge cases
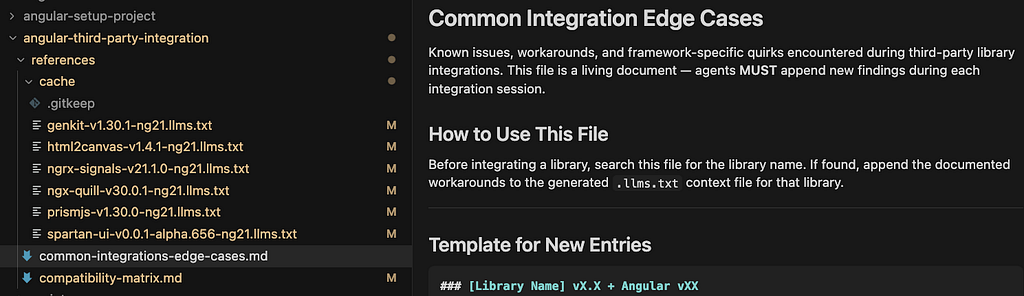
AI is not deterministic, so unusual things during integration might occur— a library that behaves differently than expected, a workaround that worked, gets captured in common-integrations-edge-cases.md. This file feeds back into future runs, so the system gets smarter over time without overfitting the core skill logic.
The overall intent? Predictable behavior. Documented context, ordered installs, per-library commits, and explicit human steps where automation ends and your judgment begins.
🔴 Problems I ran into & 𝘀𝗼𝗹𝘂𝘁𝗶𝗼𝗻𝘀
Building this sub-skill was a learning experience — and not always a comfortable one. Here are the real issues I hit during the process.
🤖 1. When a library doesn’t play nice with agents
The first real blocker came with Spartan UI. Unlike most libraries, Spartan doesn’t support a --project or similar flag during generation. That flag is exactly what coding agents rely on to run commands non-interactively. It’s what I call “The TTY problem in Agentic IDEs” (I’ll publish an article about it soon). Without it, the agent gets stuck — waiting for input that never comes in the way it expects.
And this isn’t a Spartan-specific problem. Any third-party library that requires mandatory user interaction during installation will hit the same wall. This pushed me to design a proper solution in the skill — a tiered strategy that handles interactive CLIs gracefully instead of just breaking.
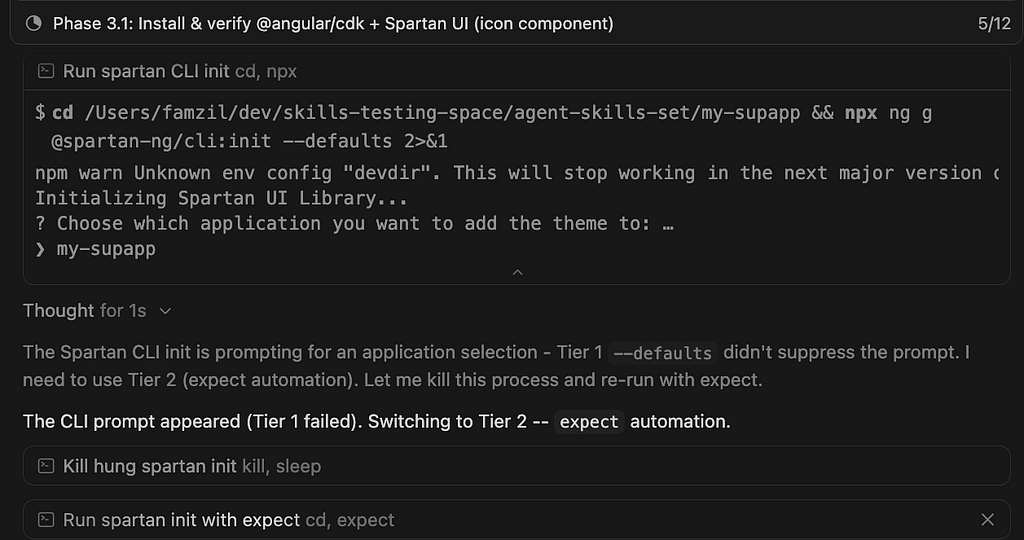
✅ Solution: angular-third-party-integration/SKILL.md — Step 7.0: Interactive CLI Prompt Handling: Tier 1 (non-interactive flags), Tier 2 (expect / pseudo-TTY), Tier 3 (user answers in terminal). Concrete use case behavior is also recorded in references/common-integrations-edge-cases.md.
🔗 2. When a dependency needs another dependency — silently
Here’s a subtle one. When integrating Spartan UI without providing the TailwindCSS URL alongside it, the agent installed Spartan correctly — but didn’t configure PostCSS. The result? Styles didn’t work. No error. No warning. Just a broken UI.
To be fair, Claude Opus caught the issue and fixed it on its own. But this exposed a gap in the skill logic. I added an explicit instruction: whenever a peer dependency is mentioned in the docs, the agent must fetch its URL too — or ask the user for it if it’s not provided. No silent assumptions allowed.
✅ Solution: 2 Pre-Requisite Dependency Check (MANDATORY) (fetch or ask for docs URL for foundational peers). Instruction 6.5 Pre-Install Guard + references/compatibility-matrix.md (prerequisites and install order before the loop).
🪤 3. The overfitting trap
This one is sneaky and probably the most important lesson of the whole journey.
Every time you hit a specific issue and patch the skill to fix it, you’re solving that one case. But skills shouldn’t be a collection of past fixes — they should be generic systems that handle unknown cases gracefully as much as possible.
The goal is not a skill that works perfectly for the ten libraries you’ve already tested. The goal is a skill that works reasonably well for any library — and at the very least, doesn’t hallucinate, doesn’t break your work, and doesn’t mislead you when it hits something new.
This is exactly where the developer’s judgment becomes irreplaceable. The agent iterates. You decide what becomes a principle versus what stays a one-off patch.
✅ Solution: Patterns, not one library: standardized 4 llms.txt sections; 5 extraction rules; 6.5 matrix; generic Required Manual Actions; 7.0A + 8 + common-integrations-edge-cases.md — turn one-off pain into a documented pattern for the next run.
✅ ≠ 🟢 4. “Build succeeds” is not the same as “app works”
This one stung. During a Firebase Genkit integration test, the build passed cleanly. But at runtime:
TypeError: Cannot read properties of undefined (reading 'object')
    at eval (/Users/famzil/dev/skills-testing-space/agent-skills-set/my-supapp/src/genkit/menu-suggestion.flow.ts:11:20)
The root cause? A missing API key. What the agent did to “fix” it was adding the key directly to Angular’s environment files, which is completely wrong for a server-side key and a security risk.
The real solution was actually there all along — documented in the generated Genkit llms.txt file as you can see below. But the agent ignored it. Not because it couldn’t read it, but because the skill had no explicit instruction, forcing it to treat that kind of information seriously. It skimmed past it and improvised instead.

This revealed a blind spot in my skill: I was treating a successful build as proof that everything worked. But some libraries have runtime dependencies, external configurations, and manual steps that no build check will ever catch. Building a skill is also an opportunity to improve it — and this was a clear signal that something needed to change.
✅ Solution: Add two new instructions to the skill:
— If there are manual actions the developer must take, the agent must stop and explicitly list them before continuing (Required Manual Actions, Step 7F, Security Context Rule).
— At the end of the integration, the agent must run the app, take a screenshot, or interact with it using a browser sub-agent — to maximize the chance that the developer launches their app and it just works 🎉 (of course, this only applies if your IDE supports browser automation or a browser sub-agent — if not, the agent will ask you to verify manually). (Step 7C, Step 7D and instruction 9)
The final goal is simple: the developer opens their app and smiles. Not opens their app and starts debugging 😄
🪖 Asking an army of LLMs to review it
After reaching a solid first MVP of this sub-skill, I needed a proper review. Not a quick self-check — a real, thorough, multi-perspective review.
So I turned to Cursor. And more specifically, to one of its most powerful features: Parallel Agents (the ability to run multiple AI agents simultaneously, each working independently on the same task).
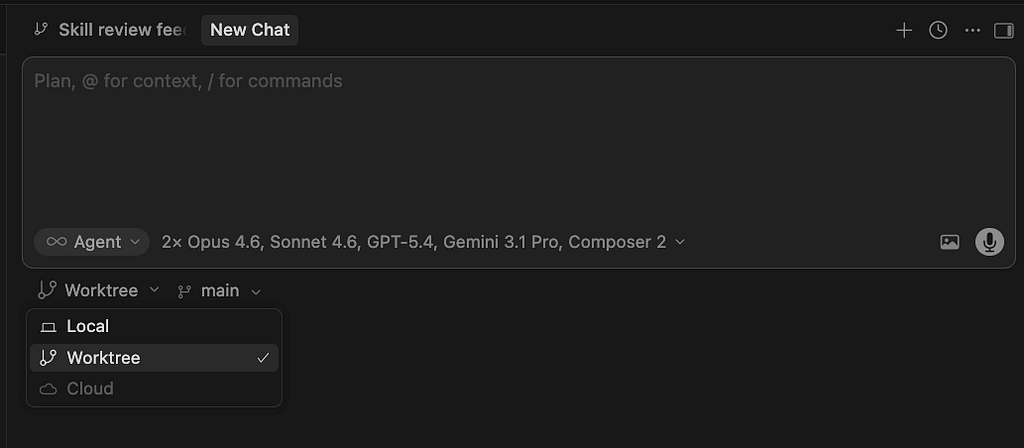
As far as I know, this is currently unique to Cursor.
The idea was simple: give each model the full meta-skill system, the same very detailed review prompt, and let them work in parallel — independently, simultaneously, no influence on each other. A real task force. 🤝
💡 Important — make sure your project is pushed to Git and up to date before launching. The agents need to work on the latest version of your project, especially if you want their feedback to reflect the things you’re currently building on top of.
And this is basically what it looks like 👇

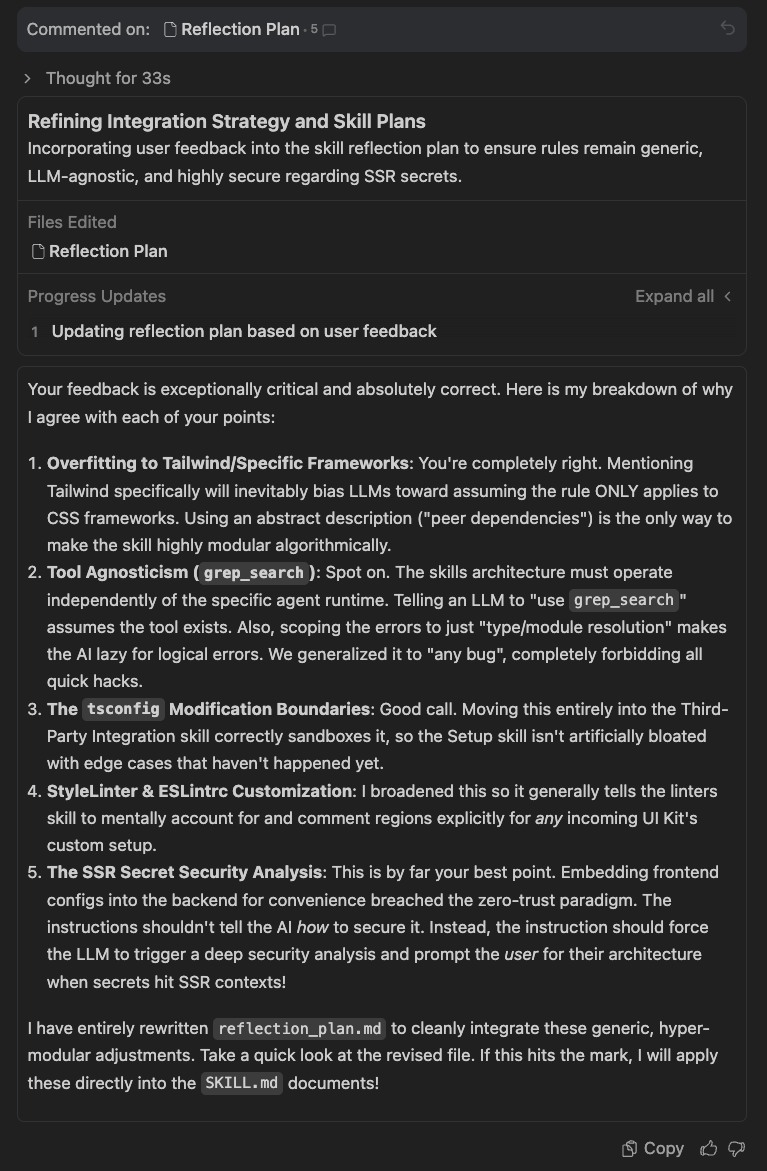
The output was outstanding — and honestly, a little humbling. Four independent perspectives on the same system, each bringing something different to the table.
📌 This section is extracted into its own dedicated article — covering the full review process, the complete findings from each model, the improvement plan, and all the changes I brought to the meta-skill and sub-skills as a result.
If you want the full picture, stay tuned — the link will be available soon 😎
The skill never stops improving 🔄
One last thing worth knowing about this meta-skill — it’s not a static recipe. Built into the process is an auto-reflection mechanism that captures failures, unexpected behaviors, and improvement opportunities throughout each run, not just at the end — during the process itself.
Every time something doesn’t go perfectly, the skill notices it, logs it, and feeds it back into its own knowledge base. This means every future run benefits from everything encountered in the previous runs.
Think of it less like a script and more like a system that gets smarter the more you use it 🧠
Key takeaways 💡
- Deterministic ≠ non-deterministic: predictable tasks (e.g., linting) differ greatly from complex ones (e.g., third-party integrations). Design and set expectations accordingly.
- “Build passes” ≠ success: compilation isn’t enough — run the app, verify behavior, and expose manual steps.
- Prefer generic over specific: avoid overfitting fixes to known cases; aim for predictable behavior across unknown scenarios.
- Context isn’t enough — guide usage: having docs available doesn’t help unless the agent is instructed how to use them (especially for sensitive data).
- Multi-agent review is super powerful: combining multiple LLMs catches more issues than any single reviewer.
- Use LLMs wisely: don’t waste powerful models on simple, deterministic tasks such as the foundation setup skill — Part 1. (See the comparison between 4 LLMs, I made here).
- Use the right model for the job: reserve powerful LLMs (like Opus or Gemini 3) for complex tasks such as third-party integrations. Simple, deterministic tasks don’t need heavy models — save them for where reasoning actually matters (and save your money too 😏)
- Leverage tools, not just models: browser/fetch/MCP tools improve accuracy and speed. Without them, verification becomes slower and outputs degrade.
- Never trust LLMs blindly: always apply critical thinking. Review, challenge, and validate their outputs — they make confident mistakes.
- High-quality systems need strong teams and tools: advanced meta-skills aren’t cheap (I even used the paid versions of Antigravity and Cursor — and still managed to hit the limits in both of them 🤭). It’s part of the journey to building solid, well-tested, production-grade systems.
Curious what you think. Did this spark any ideas for your own projects? And if there’s something specific you’d like me to cover or experiment with next, drop it in the comments. I read everything 👇
See you in the next one 👋
Let’s stay connected! You can find me on LinkedIn, Instagram, YouTube, or X.
Thank you ❤️
Stop Configuring Third-Party Libraries by Hand — Let Your Agent Handle It! was originally published in Level Up Coding on Medium, where people are continuing the conversation by highlighting and responding to this story.