I have been writing quite a bit about iOS development recently.
A while back, I wrote about SwiftUI state management in my article SwiftUI State in iOS: A Practical Guide. After that, I wrote another article on MVVM in SwiftUI, where I talked about keeping an iOS app organized as it grows.
Both of those articles came from a very practical place. I was not trying to explain iOS development from a perfect textbook point of view. I was trying to explain the things that actually help when you are building real apps.
Recently, I heard about Apple’s VisionKit again and thought, “Why have I not properly tried this yet?”
I had used Apple’s Vision framework before in smaller ways, but VisionKit felt different. It is one of those frameworks that sounds advanced at first, but once you understand what it is trying to do, it becomes very practical.
You can use VisionKit to scan documents, detect text, scan QR codes, read barcodes, and work with camera-based data. In simple words, VisionKit helps your app understand useful information from the real world using the camera.
That immediately gave me an idea.
What if I build a simple SwiftUI app that lets the user scan a document, preview the scanned pages, and maybe later extract text from it?
That is what this article is about.
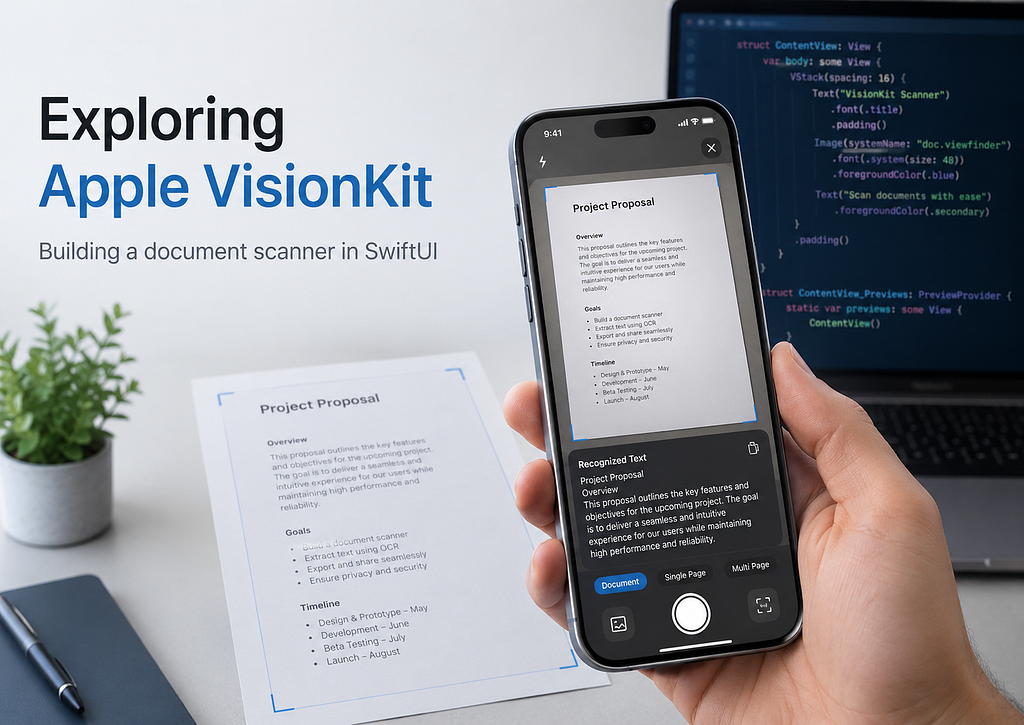
We are going to build a simple VisionKit-powered document scanner using SwiftUI.
What Is VisionKit?
VisionKit is an Apple framework that helps developers add camera-based scanning features to iOS apps.
Instead of building a full camera pipeline yourself, handling edge detection, document boundaries, perspective correction, and scanning UI, VisionKit gives you ready-made tools for common scanning use cases.
You can use VisionKit for things like:
- Scanning paper documents
- Capturing receipts
- Scanning handwritten notes
- Detecting live text from the camera
- Scanning QR codes and barcodes
- Building lightweight scanner-style apps
This is useful because many apps eventually need to deal with real-world information.
Maybe you are building an expense app and want to scan receipts.
Maybe you are building a notes app and want to scan handwritten notes.
Maybe you are building an inventory app and want to scan barcodes.
Or maybe you are like me and just curious enough to try the framework and see what it can do.
\VisionKit vs Vision
Before writing code, it helps to understand the difference between VisionKit and Vision.
The Vision framework is more focused on image analysis. It gives you APIs for things like text recognition, face detection, barcode detection, object tracking, and image classification.
VisionKit is more user-facing. It gives you ready-made UI components for scanning documents and data using the camera.
A simple way to think about it:
Vision is the engine.
VisionKit is the scanner experience.
For example, if you want to recognize text from an image manually, you may use Vision with VNRecognizeTextRequest.
But if you want to present a document scanner UI to the user, capture pages, and get scanned images back, VisionKit makes that much easier.
In this article, we will start with VisionKit document scanning.
What We Are Building
We will build a small SwiftUI app with the following features:
- A button to open the document scanner
- A VisionKit wrapper for VNDocumentCameraViewController
- A SwiftUI view to display scanned pages
- A simple model to store scanned images
- Optional text recognition using Vision
This is not a full production scanner app yet. But it gives us the foundation.
Once this works, you can extend it into:
- A receipt scanner
- A handwritten notes scanner
- A PDF scanner
- A business card scanner
- A document archive app
That is what I like about frameworks like this. You start with one simple demo, and suddenly you can see many product ideas around it.
Step 1: Create a New SwiftUI Project
Create a new iOS app in Xcode.
Use:
Interface: SwiftUI
Language: Swift
Then import VisionKit where needed:
import VisionKit
One important thing to remember is that VNDocumentCameraViewController is a UIKit controller. Since we are working in SwiftUI, we need to wrap it using UIViewControllerRepresentable.
This is a common pattern in SwiftUI when Apple gives us a UIKit API but we want to use it inside a SwiftUI app.
Step 2: Add Camera Permission
Because we are using the camera, we need to add camera permission in Info.plist.
Add this key:
<key>NSCameraUsageDescription</key>
<string>This app needs camera access to scan documents.</string>
Without this, your app will crash when trying to access the camera.
This is one of those small things that is easy to forget, especially when you are excited to test the scanner.
Step 3: Create a Scanned Document Model
Let us create a simple model to hold the scanned pages.
import SwiftUI

struct ScannedDocument: Identifiable {
    let id = UUID()
    var title: String
    var pages: [UIImage]
    var createdAt: Date
}
For now, we are keeping things simple.
Each scanned document has:
- A title
- A list of scanned page images
- A created date
Later, you could add more fields like:
- Folder name
- PDF URL
- OCR text
- Tags
- Last updated date
But for this article, images are enough.
Step 4: Create the VisionKit Scanner Wrapper
Now we need to wrap VNDocumentCameraViewController so it can be used in SwiftUI.
Create a new file called DocumentScannerView.swift.
import SwiftUI
import VisionKit

struct DocumentScannerView: UIViewControllerRepresentable {
    var onScanComplete: ([UIImage]) -> Void
    var onCancel: () -> Void
    func makeUIViewController(context: Context) -> VNDocumentCameraViewController {
        let scannerViewController = VNDocumentCameraViewController()
        scannerViewController.delegate = context.coordinator
        return scannerViewController
    }
    func updateUIViewController(
        _ uiViewController: VNDocumentCameraViewController,
        context: Context
    ) {
        // No update needed for this example
    }
    func makeCoordinator() -> Coordinator {
        Coordinator(
            onScanComplete: onScanComplete,
            onCancel: onCancel
        )
    }
    final class Coordinator: NSObject, VNDocumentCameraViewControllerDelegate {
        private let onScanComplete: ([UIImage]) -> Void
        private let onCancel: () -> Void
        init(
            onScanComplete: @escaping ([UIImage]) -> Void,
            onCancel: @escaping () -> Void
        ) {
            self.onScanComplete = onScanComplete
            self.onCancel = onCancel
        }
        func documentCameraViewController(
            _ controller: VNDocumentCameraViewController,
            didFinishWith scan: VNDocumentCameraScan
        ) {
            var scannedPages: [UIImage] = []
            for pageIndex in 0..<scan.pageCount {
                let image = scan.imageOfPage(at: pageIndex)
                scannedPages.append(image)
            }
            controller.dismiss(animated: true) {
                self.onScanComplete(scannedPages)
            }
        }
        func documentCameraViewControllerDidCancel(
            _ controller: VNDocumentCameraViewController
        ) {
            controller.dismiss(animated: true) {
                self.onCancel()
            }
        }
        func documentCameraViewController(
            _ controller: VNDocumentCameraViewController,
            didFailWithError error: Error
        ) {
            print("Document scanner failed: \(error.localizedDescription)")
            controller.dismiss(animated: true) {
                self.onCancel()
            }
        }
    }
}
There is quite a bit happening here, so let us break it down.
DocumentScannerView conforms to UIViewControllerRepresentable. This is what allows us to use a UIKit view controller inside SwiftUI.
Inside makeUIViewController, we create a VNDocumentCameraViewController.
Then we assign its delegate to the coordinator.
The coordinator receives scanner events.
When scanning finishes, this method is called:
func documentCameraViewController(
    _ controller: VNDocumentCameraViewController,
    didFinishWith scan: VNDocumentCameraScan
)
The scan object contains all the scanned pages. We loop through each page and convert it into a UIImage.
for pageIndex in 0..<scan.pageCount {
    let image = scan.imageOfPage(at: pageIndex)
    scannedPages.append(image)
}
Then we send those images back to SwiftUI using the onScanComplete closure.
This is one of my favorite parts of mixing UIKit and SwiftUI. UIKit still handles the scanner experience, but SwiftUI controls the app state.
Step 5: Build the Main SwiftUI Screen
Now let us create the main view.
import SwiftUI

struct ContentView: View {
    @State private var documents: [ScannedDocument] = []
    @State private var isShowingScanner = false
    var body: some View {
        NavigationStack {
            VStack {
                if documents.isEmpty {
                    ContentUnavailableView(
                        "No Scans Yet",
                        systemImage: "doc.viewfinder",
                        description: Text("Tap Scan Document to create your first scan.")
                    )
                } else {
                    List {
                        ForEach(documents) { document in
                            NavigationLink {
                                ScanDetailView(document: document)
                            } label: {
                                VStack(alignment: .leading, spacing: 6) {
                                    Text(document.title)
                                        .font(.headline)
                                    Text("\(document.pages.count) page(s)")
                                        .font(.subheadline)
                                        .foregroundStyle(.secondary)
                                    Text(document.createdAt.formatted())
                                        .font(.caption)
                                        .foregroundStyle(.secondary)
                                }
                                .padding(.vertical, 4)
                            }
                        }
                    }
                }
            }
            .navigationTitle("VisionKit Scanner")
            .toolbar {
                ToolbarItem(placement: .topBarTrailing) {
                    Button {
                        isShowingScanner = true
                    } label: {
                        Label("Scan", systemImage: "camera.viewfinder")
                    }
                }
            }
            .sheet(isPresented: $isShowingScanner) {
                DocumentScannerView(
                    onScanComplete: { images in
                        let newDocument = ScannedDocument(
                            title: "Scan \(documents.count + 1)",
                            pages: images,
                            createdAt: Date()
                        )
                        documents.append(newDocument)
                        isShowingScanner = false
                    },
                    onCancel: {
                        isShowingScanner = false
                    }
                )
            }
        }
    }
}
This gives us a simple scanner home screen.
If there are no scanned documents, we show an empty state.
If documents exist, we show them in a list.
When the user taps the scan button, we present the VisionKit scanner as a sheet.
.sheet(isPresented: $isShowingScanner) {
    DocumentScannerView(
        onScanComplete: { images in
            let newDocument = ScannedDocument(
                title: "Scan \(documents.count + 1)",
                pages: images,
                createdAt: Date()
            )

        documents.append(newDocument)
                    isShowingScanner = false
                },
                onCancel: {
                    isShowingScanner = false
                }
            )
        }
This connects nicely with the SwiftUI state concepts I wrote about before.
The scanner produces images.
SwiftUI stores those images in @State.
The UI updates automatically.
This is exactly why understanding state is so important in SwiftUI. Frameworks like VisionKit give you the feature, but SwiftUI state decides how your app reacts to it.
Step 6: Create a Detail View for Scanned Pages
Now let us create a view to preview the scanned pages.
import SwiftUI

struct ScanDetailView: View {
    let document: ScannedDocument
    var body: some View {
        ScrollView {
            LazyVStack(spacing: 20) {
                ForEach(Array(document.pages.enumerated()), id: \.offset) { index, image in
                    VStack(alignment: .leading, spacing: 8) {
                        Text("Page \(index + 1)")
                            .font(.headline)
                            .padding(.horizontal)
                        Image(uiImage: image)
                            .resizable()
                            .scaledToFit()
                            .clipShape(RoundedRectangle(cornerRadius: 12))
                            .shadow(radius: 4)
                            .padding(.horizontal)
                    }
                }
            }
            .padding(.vertical)
        }
        .navigationTitle(document.title)
        .navigationBarTitleDisplayMode(.inline)
    }
}
Now when the user scans a document, they can tap it and see all scanned pages.
This is already a useful little app.
It does not save anything permanently yet. It does not generate a PDF yet. It does not run OCR yet.
But the core scanning flow works.
That is usually how I like to build features.
First, make the core path work.
Then improve it.
Step 7: Add OCR Using Vision
VisionKit helps us scan the document, but what if we want to extract text from the scanned page?
For that, we can use Apple’s Vision framework.
Create a new file called TextRecognizer.swift.
import UIKit
import Vision

final class TextRecognizer {
    func recognizeText(from image: UIImage) async throws -> String {
        guard let cgImage = image.cgImage else {
            return ""
        }
        return try await withCheckedThrowingContinuation { continuation in
            let request = VNRecognizeTextRequest { request, error in
                if let error {
                    continuation.resume(throwing: error)
                    return
                }
                guard let observations = request.results as? [VNRecognizedTextObservation] else {
                    continuation.resume(returning: "")
                    return
                }
                let recognizedStrings = observations.compactMap { observation in
                    observation.topCandidates(1).first?.string
                }
                continuation.resume(returning: recognizedStrings.joined(separator: "\n"))
            }
            request.recognitionLevel = .accurate
            request.usesLanguageCorrection = true
            let handler = VNImageRequestHandler(cgImage: cgImage)
            do {
                try handler.perform([request])
            } catch {
                continuation.resume(throwing: error)
            }
        }
    }
}
This class takes a UIImage and returns recognized text.
The important part is this request:
let request = VNRecognizeTextRequest { request, error in
    // Handle OCR result
}
Then we configure it:
request.recognitionLevel = .accurate
request.usesLanguageCorrection = true
For many document scanning use cases, .accurate is a good starting point. If you need faster recognition, you can explore other options later.
Step 8: Show Recognized Text in the Detail View
Now let us update our detail view so it can run OCR on the first page.
import SwiftUI

struct ScanDetailView: View {
    let document: ScannedDocument
    @State private var recognizedText = ""
    @State private var isRecognizingText = false
    @State private var errorMessage: String?
    private let textRecognizer = TextRecognizer()
    var body: some View {
        ScrollView {
            LazyVStack(spacing: 20) {
                ForEach(Array(document.pages.enumerated()), id: \.offset) { index, image in
                    VStack(alignment: .leading, spacing: 8) {
                        Text("Page \(index + 1)")
                            .font(.headline)
                            .padding(.horizontal)
                        Image(uiImage: image)
                            .resizable()
                            .scaledToFit()
                            .clipShape(RoundedRectangle(cornerRadius: 12))
                            .shadow(radius: 4)
                            .padding(.horizontal)
                    }
                }
                Divider()
                    .padding(.horizontal)
                VStack(alignment: .leading, spacing: 12) {
                    Button {
                        Task {
                            await recognizeTextFromFirstPage()
                        }
                    } label: {
                        if isRecognizingText {
                            ProgressView()
                        } else {
                            Label("Recognize Text", systemImage: "text.viewfinder")
                        }
                    }
                    .buttonStyle(.borderedProminent)
                    .disabled(isRecognizingText || document.pages.isEmpty)
                    if let errorMessage {
                        Text(errorMessage)
                            .foregroundStyle(.red)
                            .font(.footnote)
                    }
                    if !recognizedText.isEmpty {
                        Text("Recognized Text")
                            .font(.headline)
                        Text(recognizedText)
                            .font(.body)
                            .textSelection(.enabled)
                            .padding()
                            .frame(maxWidth: .infinity, alignment: .leading)
                            .background(Color(.secondarySystemBackground))
                            .clipShape(RoundedRectangle(cornerRadius: 12))
                    }
                }
                .padding(.horizontal)
            }
            .padding(.vertical)
        }
        .navigationTitle(document.title)
        .navigationBarTitleDisplayMode(.inline)
    }
    private func recognizeTextFromFirstPage() async {
        guard let firstPage = document.pages.first else {
            return
        }
        isRecognizingText = true
        errorMessage = nil
        do {
            recognizedText = try await textRecognizer.recognizeText(from: firstPage)
        } catch {
            errorMessage = "Failed to recognize text: \(error.localizedDescription)"
        }
        isRecognizingText = false
    }
}
Now the app can scan a document and recognize text from the first page.
Again, this is not a production OCR pipeline yet, but it is enough to understand the flow.
The user scans a document.
VisionKit gives us images.
Vision extracts text from those images.
SwiftUI displays the result.
That is a pretty powerful combination.
Step 9: Move Logic Toward MVVM
In my MVVM article, I talked about why moving logic away from views helps as the app grows.
This scanner example is a perfect case where MVVM starts to make sense.
Right now, ContentView owns the scanned documents directly:
@State private var documents: [ScannedDocument] = []
That is fine for a small demo.
But if this app grows, we may want a view model.
Create a file called ScannerViewModel.swift.
import SwiftUI

@MainActor
final class ScannerViewModel: ObservableObject {
    @Published private(set) var documents: [ScannedDocument] = []
    @Published var isShowingScanner = false
    func addScannedImages(_ images: [UIImage]) {
        let document = ScannedDocument(
            title: "Scan \(documents.count + 1)",
            pages: images,
            createdAt: Date()
        )
        documents.append(document)
    }
    func showScanner() {
        isShowingScanner = true
    }
    func hideScanner() {
        isShowingScanner = false
    }
}
Then update ContentView:
import SwiftUI

struct ContentView: View {
    @StateObject private var viewModel = ScannerViewModel()
    var body: some View {
        NavigationStack {
            VStack {
                if viewModel.documents.isEmpty {
                    ContentUnavailableView(
                        "No Scans Yet",
                        systemImage: "doc.viewfinder",
                        description: Text("Tap Scan Document to create your first scan.")
                    )
                } else {
                    List {
                        ForEach(viewModel.documents) { document in
                            NavigationLink {
                                ScanDetailView(document: document)
                            } label: {
                                VStack(alignment: .leading, spacing: 6) {
                                    Text(document.title)
                                        .font(.headline)
                                    Text("\(document.pages.count) page(s)")
                                        .font(.subheadline)
                                        .foregroundStyle(.secondary)
                                    Text(document.createdAt.formatted())
                                        .font(.caption)
                                        .foregroundStyle(.secondary)
                                }
                                .padding(.vertical, 4)
                            }
                        }
                    }
                }
            }
            .navigationTitle("VisionKit Scanner")
            .toolbar {
                ToolbarItem(placement: .topBarTrailing) {
                    Button {
                        viewModel.showScanner()
                    } label: {
                        Label("Scan", systemImage: "camera.viewfinder")
                    }
                }
            }
            .sheet(isPresented: $viewModel.isShowingScanner) {
                DocumentScannerView(
                    onScanComplete: { images in
                        viewModel.addScannedImages(images)
                        viewModel.hideScanner()
                    },
                    onCancel: {
                        viewModel.hideScanner()
                    }
                )
            }
        }
    }
}
This version feels cleaner.
The view is mostly responsible for UI.
The view model handles scanner-related state.
This is where the concepts from SwiftUI state and MVVM start connecting with real frameworks.
It is one thing to learn @State, @StateObject, and ObservableObject in isolation. It is another thing to use them while integrating a real Apple framework like VisionKit.
Step 10: What About Live Text and QR Scanning?
So far, we used VisionKit for document scanning.
But VisionKit also has DataScannerViewController, which can scan live data from the camera.
This is useful when you want the user to point the camera at text, QR codes, barcodes, phone numbers, links, or other supported content.
A simple example looks like this:
import SwiftUI
import VisionKit

struct LiveDataScannerView: UIViewControllerRepresentable {
    var onRecognizedText: (String) -> Void
    func makeUIViewController(context: Context) -> DataScannerViewController {
        let scanner = DataScannerViewController(
            recognizedDataTypes: [
                .text(languages: ["en-US"])
            ],
            qualityLevel: .balanced,
            recognizesMultipleItems: true,
            isHighFrameRateTrackingEnabled: true,
            isHighlightingEnabled: true
        )
        scanner.delegate = context.coordinator
        do {
            try scanner.startScanning()
        } catch {
            print("Failed to start scanning: \(error.localizedDescription)")
        }
        return scanner
    }
    func updateUIViewController(
        _ uiViewController: DataScannerViewController,
        context: Context
    ) {
        // No update needed for this example
    }
    func makeCoordinator() -> Coordinator {
        Coordinator(onRecognizedText: onRecognizedText)
    }
    final class Coordinator: NSObject, DataScannerViewControllerDelegate {
        private let onRecognizedText: (String) -> Void
        init(onRecognizedText: @escaping (String) -> Void) {
            self.onRecognizedText = onRecognizedText
        }
        func dataScanner(
            _ dataScanner: DataScannerViewController,
            didTapOn item: RecognizedItem
        ) {
            switch item {
            case .text(let text):
                onRecognizedText(text.transcript)
            case .barcode(let barcode):
                if let payload = barcode.payloadStringValue {
                    onRecognizedText(payload)
                }
            @unknown default:
                break
            }
        }
    }
}
This is a different experience from document scanning.
With document scanning, the user captures pages.
With live data scanning, the camera is continuously looking for useful information.
You could use this for:
- QR code scanning
- Barcode scanning
- Extracting a phone number from a business card
- Detecting URLs
- Reading labels
- Scanning short pieces of text
If you are building real-world iOS tools, this opens up a lot of possibilities.
A Few Practical Notes
There are a few things I would keep in mind before using VisionKit in a production app.
First, always test on a real device. Camera-based APIs are not something you should fully trust from the simulator.
Second, design for failure. The user may cancel scanning. Camera permission may be denied. Text recognition may fail. The scanned image may be blurry.
Third, keep the first version simple. It is very tempting to add PDF export, OCR, folders, cloud sync, search, tags, and sharing immediately. But the better approach is to first make scanning feel good.
Fourth, think about privacy. If you are scanning receipts, IDs, documents, or notes, users care about where that data goes. If everything stays local, say that clearly. If you upload files to a server, explain why and how.
Where This Can Go Next
This little demo can become much more useful.
The next features I would add are:
- Save scanned documents locally
- Export scanned pages as PDF
- Add OCR for all pages
- Add search across recognized text
- Add folders
- Add rename and delete
- Add share sheet support
- Add basic image cleanup filters
- Add iCloud sync later if needed
This is how I usually like learning a new framework.
Not by reading every API first.
Not by trying to build a perfect app immediately.
But by building one small useful flow, then improving it piece by piece.
VisionKit is a good framework for that style of learning because you can get something working quickly, but there is still enough depth to build a real app from it.
I have also uploaded the complete sample project to GitHub here:
https://github.com/sanjaynela/visionkit-scanner-ios
Feel free to clone it, try it on a real iPhone, and modify it for your own scanner-style app. If you build something interesting with VisionKit, I would love to hear about it.
Final Thoughts
Trying VisionKit reminded me why I enjoy iOS development.
Apple gives us these powerful native frameworks, but the real learning happens when we connect them to actual app ideas.
A document scanner sounds simple at first. But once you build it, you start thinking about OCR, PDFs, local storage, search, folders, privacy, and user experience.
That is when a small demo becomes a real product idea.
If you already understand SwiftUI state and MVVM, VisionKit is a nice next framework to explore because it gives you something practical to build. You can use SwiftUI for the app structure, MVVM for organization, VisionKit for scanning, and Vision for text recognition.
That combination is powerful.
And honestly, this is the kind of framework I wish I had tried earlier.
Sometimes the best way to learn a new Apple framework is not to wait until you need it at work. It is to build a small personal app, break a few things, fix them, and slowly understand where the framework fits.
That is exactly what I wanted to do with VisionKit.
And now I can already see a few app ideas coming from it.
I Finally Tried Apple VisionKit: Building a Simple Document Scanner in SwiftUI was originally published in Level Up Coding on Medium, where people are continuing the conversation by highlighting and responding to this story.